Monday, November 15, 2010

Class I Homework ~ Part II ~

Truffled poached eggs rounded out our scone and orange-ricotta pancake brunch.  So delicious.

My friends and I decided to put together a brunch since I was in the mood to eat pancakes.  I love ricotta pancakes and they're so fool proof yet better than anything you can get at a restaurant, no matter how famous it may be.  And since this would be the perfect opportunity to have any baking projects consumed, I decided to practice making scones.

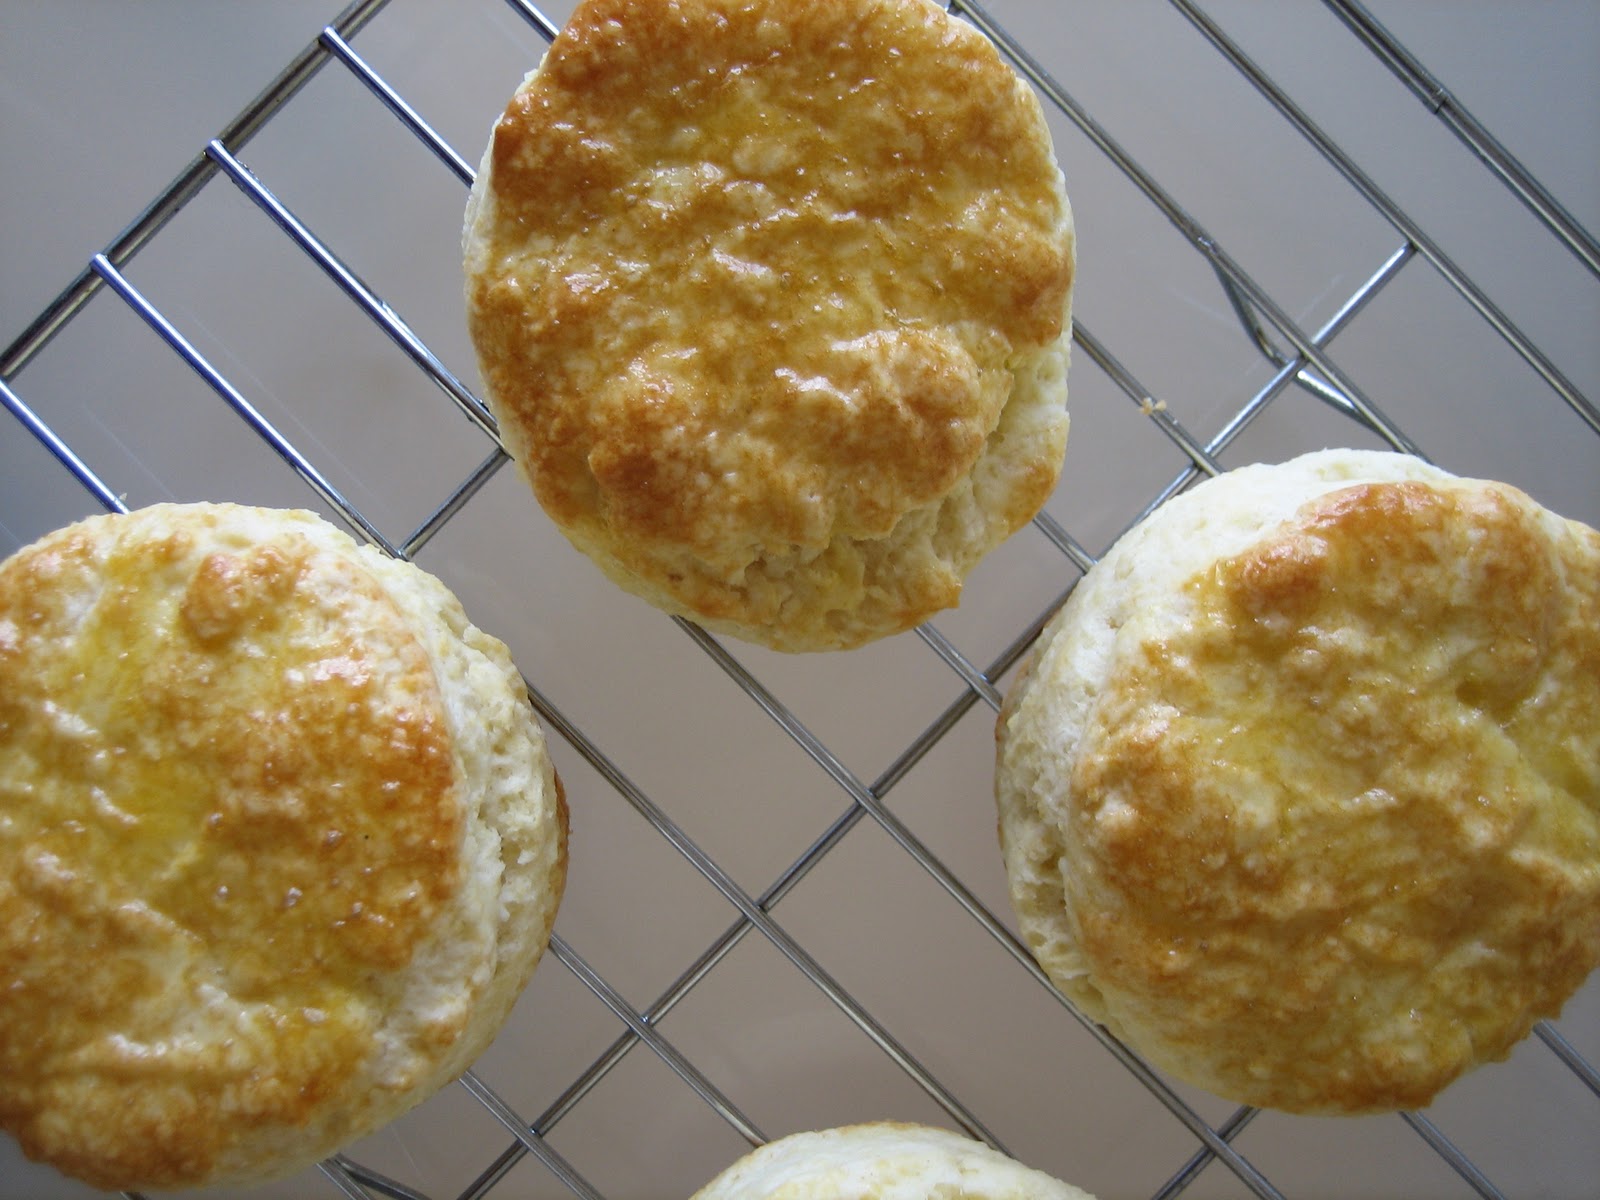
First, I remade the scones we did in class, with currants, except I left out the orange zest.  I wanted to see how the batter tasted plain.  I was a little under the weather this day though, so wasn't fully there and I ended up using salted butter instead of unsalted, and I forgot to add the sugar.  I baked them anyway and surprisingly, everyone loved them.  Seriously.  They were a smidgen salty for my tastes, but I don't like a lot of salt.  Everyone else just thought they tasted like the most amazing biscuits, albeit studded with currants.  Who knew?
Next came Claire Clark's Cream Scones.  I'd made these once before, way before, and while they turned out okay, I didn't really know how to make scones at the time.  This time turned out much better!  These scones don't use any egg, which I think makes them a little more crumbly than if you added an egg, but until I make a few more batches to really be sure, this may just be conjecture.  Regardless, they turned out great, and I love the look of the egg wash.  Scones definitely need an egg wash, not just cream.

Last came the fresh strawberry scones.  Teacher had told us in class that you can't just add fresh fruit to a regular scone recipe because it won't work.  There's too much liquid in fresh fruit.  She put a recipe for fresh strawberry scones on her blog and told us to check it out if we were interested, so I did.  The batter came out really runny and impossible to shape.  In hindsight, I guess I could've added more flour but oh well.  I just scooped out dough into little mounds and baked them.  I should've known to use far less dough per scone than I did, but of course, being slightly sick, I wasn't thinking and just went ahead with the giant blobs.  So I shouldn't have been surprised when out came these huge flying saucers, but I was.


Good thing they tasted great!  I've found that quite a few people don't really like scones because they can be on the dry side, but these blobs were really moist and flavorful and you could really taste the strawberry.  They aren't the most shapely scone, but they were the first to be gobbled up by the brunch table.

Last but not least comes my clotted cream making experiment.  I forgot to take this to the brunch so I ate them with the leftover scones later that day.  Sorry friends!

I'd always heard that you could make your own clotted cream since it's so expensive to buy them from those specialty gourmet grocery stores.  I found a recipe that said all you needed was unpasturized or pasturized cream (it would work as long as it wasn't ultra-pasturized).  I found some pasturized cream at Trader Joe's, so I dumped a pint sized bottle of it into an 8 by 8 Pyrex baking dish.  I set my oven to the warm setting and left it in there, covered with aluminum foil, overnight.  I left it there for approximately 10 hours.  Then I let it cool, scooped off the stuff on top, put that in the fridge, and voila--clotted cream!


It definitely wasn't as sweet and flavorful as real clotted cream made from fresh unpasturized cream, but it was still quite tasty on the reheated scones.  It doesn't make a lot though, so it actually might be worth it to pay the price tag on the expensive glass jarred stuff.  But it's a fun little experiment, and if you can't find any where you live, this is a great alternative for your next afternoon tea party!

Thursday, November 11, 2010

Class I Homework ~ Part I ~

I apologize for neglecting this blog for so long!  I got sick and then became so busy with work and prepping for a special event that I will write all about later...but I know I know, these are just excuses.

Anyway, I'm back, and before I head off on my Thanksgiving vacation I promise to be more diligent about sharing.


First off is the homework project I did after my first class on quick breads.  Teacher recommended trying out an apple version of the blueberry streusel muffins so that's exactly what I did.  I baked a batch to give to a co-worker who just had a baby.  They came out pretty well although probably slightly over mixed.  Or it needed more sugar since the apples I used weren't too sweet.  Regardless, they weren't as good as the blueberry ones we made in class, but they were decent.


 You probably can't tell from the dark pictures, but they really were just fine. 

The big problem lay in the streusel topping.  I unfortunately had used old walnuts without realizing it.  Now I know the importance of tasting!  Or at least marking when I first use ingredients...

Needless to say, my co-worker did not see these muffins.  The inside of my trash can did though.


Practice session #2 came out much better.  I attempted the carrot cake Teacher demo-ed in class.  I decided to practice frosting the cake too, so I decided on a 2 layer cake with a cream cheese frosting.


The cake came out moist and flavorful, just like Teacher's.  The frosting job was mediocre, but I don't make layer cakes very often so I will just keep practicing until I get it right.  Also, I only had one single 8 oz packet of cream cheese so couldn't make very much frosting, which I needed if I was to create those thick layers you always see in magazines.  Taste-wise, it was probably better this way since the cake doesn't need gobs of frosting but stingy frosting certainly doesn't make for the prettiest cake.


Oh well.  That's why they call it homework.  The more I practice, the better I'll get, so I'll just keep chugging along.


And I didn't forget about practicing scones as homework!  Next up will be the three kinds of scones I baked to compare recipes and to practice my butter rubbing technique.  Fun times.

Tuesday, October 26, 2010

Pro Baking I ~ Class 1 ~

I forgot to take my camera to class AND I deleted the first set of pictures I took accidentally so please bear with the sparse picture selection...
I started reading pastry textbooks in order to learn more about the science and technique behind baking, but no matter how much I read and experiment, it just doesn’t compare to watching a professional work and stealing their methods.  I imagine this is why apprenticeships always involve a lot of watching and mimicry.  

So, I decided to just go for it and signed up to take New School of Cooking’s Pro I Baking course.  It meets every Sunday morning for 10 weeks and it’s pricey, but it’s perfect for someone like me who can’t afford to attend a full time CIA or Le Cordon Bleu type school.  Although Le Cordon Bleu in Hollywood has a Food History course I’m DYING to take...

Streusel topping!

Anyhoo, Class 1 started off with Quickbreads.  Technically, a quickbread is a bread or cake that uses a chemical leavener.  That basically amounts to muffins, carrot cakes, biscuits, and scones, among others.

After the lecture that went into much more detail that that one measly sentence above, our teacher Carol walked through making a carrot cake.  Then she demonstrated how to make currant scones and blueberry streusel muffins.  After that, we were off measuring and mixing and making our own scones and muffins.  We got to taste her carrot cake but the making part was homework, although in this class, homework is a loose term.  It's not exactly required so it just depends on if you feel like practicing or not.

How did everything turn out you ask?


The blueberry muffin was perfectly moist, not too sweet, with a walnut streusel.  I love streusel topping, although I prefer an oat based one over a nut based one, but who can say no to butter, sugar, and nuts?  It was a good, solid blueberry muffin, but not my favorite.  I think I like creamed ones more, ones that use butter instead of oil.  But I have to try another recipe before I can be sure.  My friends who tried these raved about them though.  They're definitely better than Starbucks, that's for sure.

Currants, with little flecks of orange zest

As for the scones--the texture of these little guys was the best I’ve ever made.  They didn't turn out very pretty and my squares ended up a bit odd shaped, but they were moist while being the right amount of crumbly with that crust.  I could do without the sugar topping though.  Next time, I'm going with an egg wash to get that golden colored top.  Practice makes perfect so I'll get cracking on these.

Definitely don't need extra butter on these guys!

I'm excited to try making the carrot cake.  The one Teacher baked in class was ridiculously moist, spiced, and just really yummy.  Usually I need a lot of cream cheese frosting to mask the mediocre quality of the carrot cake layer(s), but not in this one.  I can see why The Appropriated Muffin posted the recipe on her site.  That's where I first read about it.  She called it the best carrot cake ever so I was going to try it but then the class came up.  Now I know where the recipe is from and I'm excited to try it myself, especially since I can't remember the last time I made carrot cake.

Time for some homework!

Thursday, October 21, 2010

Mango: Part Four ~ Mango Mousse Cake ~


This is actually from back in August when I made them for my dad’s birthday dinner, but I had to share since I'm so proud of them! On his birthday, my mom and grandparents were also in town to help my sister move up north, so we all got together at my place to celebrate with some of Obachan’s (grandma's) home cooking and desserts by their favorite pastry chef--me.  At least I tell myself that.

Since it was still summer, I though I’d go with something refreshing. And since I wanted to impress them, I thought I’d be overly ambitious and attempt a recipe by Toshi Yoroizuka, the same chef that created my failed fig mousse cake, although to no fault of his own. I reiterate that his recipe was delicious. I’m the one that made a mistake somewhere so the mousse didn’t set, except I can’t remember where I went wrong.  I still ended up with a great fig frozen mousse ice cream thing though. Yeah...


Anyway, so this is what it's supposed to look like: Yoroizuka's Mango Banana Mousse Cake.

And here's the recipe in Japanese.

If you can read or decipher French, here's the handwritten recipe.

The top layer is a mango mousse.  The middle one is a banana mousse with a hint of pineapple, filled with pineapple chunks.  The bottom is a coconut dacquoise, the first dacquoise I’ve ever made. Everything came out well.  You could really taste all the individual fruit flavors, and the texture of the coconut in the dacquoise just brought everything together.  Nothing was too sweet, and it was perfectly delicate in that Japanese-French way.  

I don't have hundreds of molds so mine ended up being circles instead of that fancy square layer thing Yoroizuka does.  One day.


I made the full recipe this time, which means I ended up with a lot of leftover mousse and cake. I made a mental note to only make a half recipe the next time. But as I found out with the fig mousse, I really only need to do a third or a fourth of his recipes. Now I just need to figure out which one of his 175+ recipes he has up online that I want to attempt...


Sunday, October 17, 2010

Mango: Part Three ~ Mango Macarons ~


I had left over mango puree from the Mango Purin so I decided to practice making macarons again.  I want to perfect my mixing and piping techniques which means I have to make them as often as I can.


I used my usual macaron recipe and made a standard 1:2:3 ration Swiss buttercream (1 part egg, 2 parts sugar, 3 parts butter) then added in the leftover mango puree, tasting until it felt mango-y enough.

The macarons came out well!  I still have to work on piping them so they’re smooth on top and even in size, but the texture was the best I’ve ever achieved.  I think I now know the exact amount of mixing that’s required, or at least I think I do.  I need to make another batch as soon as my oven’s fixed to test it out.


But cheers for a successful batch!


Thursday, October 14, 2010

Mango: Part Two ~ Mango "Purin" ~


In Japanese, we call them “purin” ( プリン), which basically is the japanese-a-fied pronunciation of the word pudding. There are various types of purin, and anything that is a custard texture inevitably is named this whether it’s actually a pots de creme, a flan, a panna cotta, or a creme brulee minus the burnt sugar crust. Side Note: panna cotta’s in Japan are often actually called panna cotta, but you’ll often see a “milk purin” that is really just a panna cotta. So even that isn’t constant. 

The purin I made isn’t egg based and isn’t baked. It uses gelatin so it’s really a mango panna cotta, but I used a Japanese recipe and we Japanese love mango purin, so I’m calling it that. Accept it.  (Please)


Mango Purin is pretty much the same thing as what dim sum restaurants call mango tofu. Don’t worry, we don’t claim it as one of our own. We love it but we know it comes from Hong Kong cuisine.


It’s fitting that the most famous version in Japan is from The Peninsula Hotel in Ginza since the Peninsula hotel group is a Hong Kong company.  Hopefully I’ll get to eat one myself when I go to Tokyo in December.  I’ve been reading about it for years.


My version isn’t quite as fancy as theirs but it has all the same elements: the custard, the sauce, and the fresh mango chunks. The mango flavor wasn’t quite as pronounced in the custard as I would have liked so next time I need to increase the amount of mango puree used. Also, I would use more whipping cream next time. This version was heavy on milk, and since I only had skim milk I used that. Big mistake. I needed to go all out and use whole milk. It's dessert after all. This was good, just not as good as it could’ve been.


That’s okay. I’ll get my fix in December. Plus, there’s always mango season again next year.

Monday, October 11, 2010

Mango: Part One ~ Mango Creem Cheese Pie ~


My mom is a great cook.  My grandma’s an even better one.  But neither is much of a baker so growing up, all the homemade cookies and treats we had were made by one of my “aunties”--Aunty L, Aunty C, and Aunty A.  These three ladies are some of my mom’s oldest friends, and they are fabulous bakers. 

According to my memory bank, Aunty A and Aunty C made the best cookies, especially crispy, buttery ones like Aunty A’s cornflake cookies.  Aunty L made the BEST banana bread.  But the most memorable dessert is this mango cheesecake that Aunty L would make for us from time to time.  It had a buttery crust, a cream cheesy middle, and the top layer was a clear jello filled with fresh chunks of local Hawaii mangoes.  It was one of my favorite desserts growing up.  It’s nothing refined or fancy, but it’s fresh, not too sweet, and so local.

A couple of weeks ago, my mom finally mailed me the recipes from Aunty L.  Score!  I promptly bought some mangoes even though they aren’t exactly in season, nor were they on sale, but I couldn’t help it.
The recipe was even simpler than I thought.  It’s a bit time consuming since there are three parts to it, but each layer isn’t too complicated.  And I learned I have to be careful when pouring the mango jello mixture on top.  I’m using a ladle the next time I make this.  For this first attempt, I accidentally poured from the mixing bowl and it made the cream cheese layer splatter a bit, creating little white flecks through the jello.  Not the prettiest look to have...

It tasted just like I remembered though.  Aunty L’s were always cut a little nicer, and they of course didn’t have little white flecks of cream cheese in the jello part, but it still made me think of all the happy times growing up with my family back in Hawaii.  

I’m definitely making this again when it’s mango season!

Sunday, October 10, 2010

Mango ~ an introduction ~


Meet my friend Mangifera indica, otherwise known as Mango. M’s another fruit with a long family history with some religious significance. They’ve been around for at least 4000 years, and they’re indigenous to India, making it fitting that Siddhartha meditated under mango trees in his quest to become Buddha. India’s hot, humid, tropical weather is ideal for this orange member of the cashew and pistachio family. It’s also why Hawaii is the perfect place for them too.

Back in Hawaii, people with mango trees in their yard would start picking them around May to make mango chutney. I remember my junior year of high school going to various houses to pick buckets of green mangos to turn into Punahou Carnival’s famous mango chutney.  Mango trees are huge and bear a lot of fruit, so most people were glad that the junior class would come by every year to decrease their yield. Because once those guys start ripening, they will fall off the tree and make a rotting juicy mess all around the yard if you’re not careful!


My family always ate mangoes fresh, but my Aunty L would occasionally make these mango cheesecake bars for our family that I LOVED. Little did I know back then that while I was eating a sugary dessert, they actually also had a lot of Vitamin C. Mangoes deliver about 80% of your daily Vitamin C needs per serving. They also have some Vitamin A, but only 25% per serving. One cup surprisingly only has about 110 calories. I don’t know about you but I always thought the fruit was more caloric than that since it’s just so sweet!


Tommy Atkins is the most popular cultivar in the US. Best from March-July then again from October-January. They originated in Florida back in the 1920s. They’re red with some green and yellow/orange sections, depending on their mood.

The Kent’s also another popular one here in the states. Sometimes it likes to put a little rouge on it’s dark green cheeks. These guys are sweeter than the Tommy Atkins and are best January through March, and again from June to August.

Keitt is the one you find most often in Asia. Best from August to September, and the sweet fruity flesh covered by a green skin is perfectly tropical.

Haden is big in Mexico, and naturally so with a bright red exterior with yellow and green accents.

Ataulfo / Champagne mangoes are also from Mexico.  These little yellow guys are very sweet and creamy. Delicate little buggers they are.

Francis comes to us from Haiti.  It has a bright yellow skin with streaks of green, and it’s sweet, with a little kick.

By now, I hope you can tell that color is not an indicator of ripeness when it comes to mangoes because they come in all different shades. The best way to tell if they’re sweet and juicy is to gently squeeze them. Usually they’ll smell mango-y too. I bought some sweet smelling, slightly soft to the touch mangoes myself so will return soon with my creations.

Figs: Part Six ~ A Neighbor's Fig Tree ~

 
My oven is still broken.

Right after making the newtons, I geared myself up to make some fig macarons for my last fig post.  I measured the cookie ingredients and made the fig buttercream filling by mixing some leftover homemade fig puree/jam (from the fig newtons) with a standard swiss buttercream.  I was all set to go when I woke up the next morning to find that my oven wouldn't get hot.  

It's one thing to take a cookie sheet of already made newtons to a friend's house to stick it in her oven.  It's quite another to make macaron batter, pipe it out, let it sit, bake it in multiple batches, then let it cool.

It's been a week now and after two visits by the building handyman, it still hasn't been fixed.

Grrr.

Since I have other things to post, I leave my fig friends behind with some pictures of a neighbor's fig tree.  I only just noticed its existence a couple weeks ago even though I've been jogging by it for the past year and a half...


But it's pretty neat to see how they actually grow. 


Bye bye Mr. Fig.  See you again soon.

Wednesday, October 6, 2010

Figs: Part Five ~ Fig Newtons ~


Even Nabisco doesn’t seem to have one singular solid story of where the Fig Newton originated from, but the best version states that a baker by the name of Charles Roser came up with the recipe for the fig filled biscuit. Then in 1892, James Henry Mitchell patented a machine that was able to insert fig paste inside pastry dough. The machine was like a funnel within a funnel, continually spitting out fig paste and cookie dough, creating an endless filled cookie that could be cut into individual pieces. Imagine if Nabisco sold foot long Fig Newtons. Amazing. I mean, they’re capable of it. They should. I’d buy a box. I might be the only one buying it though. And I’d buy just one box. Clearly this is the greatest business proposition ever.


Sorry for that tangent. To continue, the rest of the story has to do with the name. If the supposed inventors were a Roser and a Mitchell, why a Newton? Well, the original maker of the cookie was the Kennedy Biscuit Company, soon to be swallowed up into the behemoth that is Nabisco. They had a habit of naming their products after towns nearby. They already had a Shrewsbury, Harvard, and Beacon Hill product, so they chose to utilize Newton, Massachussets good name. And there you have it. The Fig Newton was born.

I love Fig Newtons but the biscuit part always seems a bit dry. And after seeing Martha Stewart’s recipe in her Cookie book, I’ve always wanted to try making it but as with all things in my life, I was just too lazy about it. Until now. I googled a bunch of recipes since I didn’t really like the one in the Cookie book. They looked like bars with all four edges showing the fig filling, not cookies that only had two open sides. I settled on one from CDKitchen.

I made the dough, rolled it out, trimmed the edges, then spooned on some filling I made from figs leftover from other projects. I had two types in the fridge. The darker one came from the Cookie book, except I improvised by using leftover fresh figs instead of dried, and my leftover figs were a mixture of Calimyrnas, Brown Turkeys, and Mission figs. I deviate from recipes. The lighter one was just something I threw together after making the mousse cake. I had leftover Brown Turkeys and Calimyrnas so dumped them in a saucepan with some sugar and simmered away. They were both nice and figgy, but the red wine one tasted more sophisticated. More adult. Guess I’m not a kid anymore.

Then it came time to bake except my oven wouldn’t turn on! I’m sure it’s just the pilot light but I’m scared of gas. I ended up driving to J’s and borrowing her oven. I felt funny driving with the cookie sheet on the passenger seat next to me. All they needed was an oven! Poor little guys.

Soon they were placed in the comforting warmth of the oven and they baked up nice and brown. I cut them while still warm to minimize crackage of the cookie dough. They didn’t turn out as the most shapely creatures, but they were tasty! The edges were a little crispy, and the filling warm and soft. And as K pointed out, they actually tasted like figs. They tasted better than the photographs make them out to be.

I still like artificial machine made scarily uniform Nabisco Fig Newtons though. Mine are better, but I’m not baking an entire batch for you for $2.50. Freshness comes with a price!